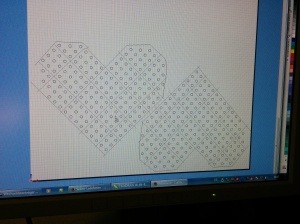
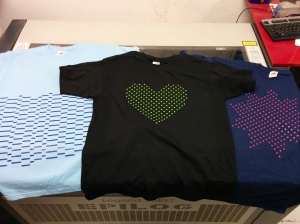
If you want to use P3F to communicate and enforce your personal picture privacy preference, all you need is a privacy T-shirt with a privacy pattern of your choice. In this tutorial, we will teach you how to create your own privacy T-shirt in a few easy steps.
The first thing you need to get started is a plain T-shirt (without any prints or clothing patterns on it; 90%-100% cotton preferred for heat resistance) in the colour of your choice. Additionally, you need to download your desired privacy pattern from here (PDF). There are three ways of getting the pattern on your T-shirt: you can either use a transfer film and print the pattern with an inkjet printer on the film and then fuse the pattern on your T-shirt. You can also upload the privacy pattern of your choice to on-demand T-shirt printing services, such as spreadshirt.de. Many copyshops also offer such services.
The P3F project team tried out the flex film transfer method by themselves: we went to Metalab and used their T-shirt printing equipment. In this tutorial, we will explain to you how we did that so that you can do the same.
The Metalab is an open hacker space in the city of Vienna. In most cities you can find such awesome places where you can go to learn more things, exchange your knowledge and work on your own creative projects such as making your own privacy T-shirts. Most T-shirt printing and copy shops use the same technique as described below.
At the Metalab in Vienna, they have a vinyl-plotting machine (Roland GX-24) which you can use to cut out the colour film and a heat press to stick the film on the T-Shirt. Various colored films are available directly at Metalab for a small contribution towards expenses (you can also bring your own if you want to). These colour films come on a transparent carrier that hold the shapes in place.
T-Shirt Printing Recipe
1. Select a T-Shirt and (flex or flock) film colour. Consider that P3F requires a certain contrast in order to function. Therefore, we recommend colour combinations with a high contrast such as black on yellow, pink on dark blue, dark blue or black on light blue or light green on black.
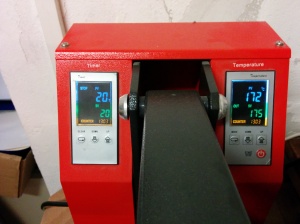
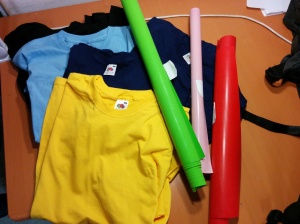 2. Turn on the heat press so that it can pre-heat while you cut the film. Set to 170°C.
3. Place the film in the cutter, the film has two sides, a (mostly transparent) supportive layer and a sticky layer. Make sure to have the sticky layer on the upper side.
4. Open Corel Draw and load the pattern templates of your choice and convert the pattern elements to curves in order to avoid distortions and artifacts. TIP: add some extra cuts into the removed areas, to ease the peeling later on. Never put extra cuts into the colour areas.
5. Click the Icon “Cut Studio” on the menu bar. If you print text on a T-shirt you first need to mirror the motive (Object > Mirror). In case of our privacy patterns, this is not needed as they are all symmetric but highly recommended for text.
6. You also need to transfer the width of the film to the machine driver. This can be done by clicking File > Cutting Setup > Properties > Get from machine.
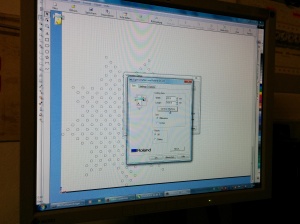
7. Now you should see the Graphic and the real size of the motives relative to the film. Do a final checkup before you are ready to cut. Click File > Cutting… > OK to actually cut.
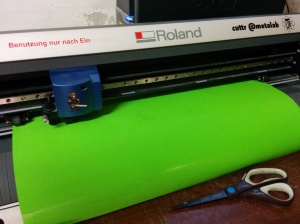
8. After cutting, carefully remove the parts of the film that you do not want to have on the T-shirt. Use a sharp knife or tweezers. Usually there are no problems peeling the unused colour film from the carrier film.
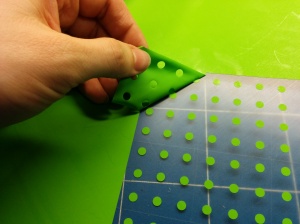
9. Check the heat press, the temperature on the display should be around 160-180°C.
10. Put the T-Shirt into the heat press so that the side you want to print on faces you. Try to sleek the fabric to remove tucks and crinkles.
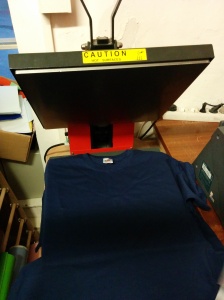
11. Put the film with the motive onto the T-shirt and compress it for about 20 seconds. Wait for a few more seconds so that it cools down a little.
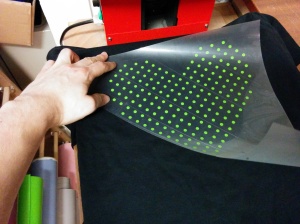
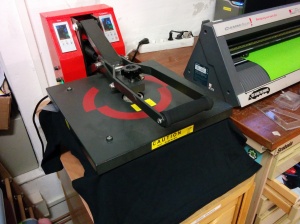
12. Then, peel off the supportive carrier layer and compress it again for 3-5 seconds.
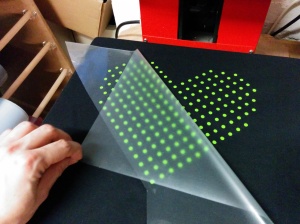
13. Take your privacy T-Shirt out and enjoy your picture privacy
TIP: If you have large consecutive areas of colour film removed, add some extra cuts to ease the peeling step.
PRO TIP: You can use almost any form of the polka dots (we used star and heart), as long as it has a big area filled with these dots.
Washing instructions: Wash inside-out at 40°C. Dry hanging, or use tumble dry at low temperature only. If you like to iron, do it inside out.
If you have any questions, please visit p3f.at or contact us.
Yours,
the P3F Project Team,
Adrian & Katharina
